Wednesday, November 28, 2007

Converting phpBB2 to phpBB3

phpBB is my favorite bulletin board system. After 4 years running on phpBB2, I tried to convert my board to phpBB3 RC7 (this is the latest at the time of writing). My phpBB2 version was 2.0.21. I read many in phpBB community forums, many people had some kinds of problem in conversion with the built-in convertor. I tried it myself and failed for 3 times. The problem was connection timed-out during conversion. Googling a bit, I found a solution. Thanks for the problem solver. You are a hero!. :-) Check it out here. This is how I did it:

Open phpbb3/install/install_convert.php

Find these lines:

/**
*
* @package install
* @version $Id: install_convert.php,v 1.53 2007/10/11 08:12:25 acydburn Exp $
* @copyright (c) 2006 phpBB Group
* @license http://opensource.org/licenses/gpl-license.php GNU Public License
*
*/

/**
*/

After those lines, add:
@set_time_limit(0);
@ini_set('memory_limit', '256M');
@ini_set('upload_max_filesize', '128M');
@ini_set('post_max_size', '256M');
@ini_set('max_input_time', '-1');
@ini_set('max_execution_time', '-1');
@ini_set('expect.timeout', '-1');
@ini_set('default_socket_timeout', '-1');
(Adjust timeouts and size as needed.)

Next find:
var $batch_size = 2000;
Change to:
var $batch_size = 6000;
It worked for me. I hope this benefits others. Good luck! :-)

Monday, November 19, 2007

apt-get: dynamic MMAP out of room

Recently after upgrading wine and a few other packages, apt-get threw errors like these:

Reading package lists... Error!
E: Dynamic MMap ran out of room
E: Error occurred while processing libedataserverui1.2-6 (NewFileVer1)
E: Problem with MergeList /var/lib/dpkg/status
E: The package lists or status file could not be parsed or opened.

I also could not use apt-cache and it threw the same error messages. The solution is just one-liner:

APT::Cache-Limit 12582912;

put that line in /etc/apt/apt.conf . It solved the problem at least for me. :-)

If it still hasn't solved the problem, try increasing the cache-limit value.

Friday, October 26, 2007

fail2ban - Yet another tool to protect your server


What is Fail2ban?

Fail2ban scans log files like /var/log/auth.log or /var/log/apache/error_log and bans IP that makes too many password failures. It updates firewall rules to reject the IP address. These rules can be defined by the user. Fail2ban can read multiple log files such as sshd or Apache web server ones. You need python >= 2.3, gamin >= 0.0.21 (optional) and one of these : iptables, shorewall or tcpwrapper.

What does the version number of Fail2ban mean?

The structure of the version number is major.minor.revision. Currently the major number is 0. The policy for minor is:

  • odd numbers (0.5, 0.7, etc) are development versions.
  • even numbers (0.6, 0.8, etc) are stable versions.
Fail2ban is free software; you can redistribute it and/or modify it under the terms of the GNU General Public License as published by the Free Software Foundation; either version 2 of the License, or (at your option) any later version.

Where can I get it?

fail2ban source can be downloaded from here. Distro-specific packages can be downloaded from http://www.fail2ban.org/wiki/index.php/Downloads. You might want to try using package manager first. It might be in your distros repositories. Chances are it is the older version. That's why I like to install from source :). For debianista, apt-get install fail2ban will take care of it.

Installation

As of this writing, the latest version is 0.8.1.
1. Extracting : tar xjvf fail2ban-0.8.1.tar.bz2
2. cd fail2ban-0.8.1
3. python setup.py install

This will install Fail2Ban into /usr/share/fail2ban. The executable scripts are placed into /usr/bin.

Fail2Ban should be correctly installed now. Just type:

fail2ban-client -h

to see if everything is alright. You should always use fail2ban-client and never call fail2ban-server directly. UPDATE: to be able to activate and control fail2ban server, you need to copy init file specific for your distro in fail2ban-0.8.1/files directory. For Mandriva, you can use RedHat one. Copy file redhat-initd to /etc/init.d directory :

cp redhat-initd /etc/init.d/fail2ban

There are also init files for SuSe and Gentoo.

Configuration

1. Edit file /etc/fail2ban/fail2ban.conf using your favorite editor. I used joe for it. So:

cd /etc/fail2ban
joe fail2ban.conf

In this file, you may want to increase the loglevel to 4 for more verbose log for troubleshooting purposes.

2. Edit file /etc/fail2ban/jail.conf
joe jail.conf

In this file, uncomment sections that you want to activate and change enabled = false to enabled = true. Say, you want fail2ban to monitor port 22 (ssh) for login attempts :

[ssh-iptables]
enabled = true
filter = sshd
action = iptables[name=SSH, port=ssh, protocol=tcp]
# sendmail-whois[name=SSH, dest=you@mail.com, sender=fail2ban@mail.com]
logpath = /var/log/auth.log
maxretry = 4

There are many sections in there for monitoring other ports like ftp, http, etc. It's up to you to monitor which ports. Just uncomment the sections you want and change enabled = true to activate in those sections. If you want to be notified, uncomment the commented line above and replace your email address for dest (and for sender too to reflect your system mails). I change the log path to /var/log/auth.log because this is the authentication log for my system. Change it accordingly for your system. All fail2ban actions are logged and can be reviewed by tail /var/log/fail2ban.log. Example of fail2ban.log on my system:

-- START --
2007-10-26 00:24:56,880 fail2ban.filter : DEBUG /var/log/auth.log has been modified
2007-10-26 00:24:56,880 fail2ban.filter : DEBUG Opened /var/log/auth.log
2007-10-26 00:24:56,881 fail2ban.filter : DEBUG Setting file position to 783921 for /var/log/auth.log
2007-10-26 00:24:56,882 fail2ban.filter : DEBUG Found 200.32.73.4
2007-10-26 00:24:56,883 fail2ban.filter : DEBUG Found 200.32.73.4
2007-10-26 00:24:56,883 fail2ban.filter.datedetector: DEBUG Sorting the template list
2007-10-26 00:24:57,868 fail2ban.actions: WARNING [ssh-iptables] Ban 200.32.73.4
2007-10-26 00:24:57,868 fail2ban.actions.action: DEBUG iptables -n -L INPUT | grep -q fail2ban-SSH
2007-10-26 00:24:57,886 fail2ban.actions.action: DEBUG iptables -n -L INPUT | grep -q fail2ban-SSH returned successfully
2007-10-26 00:24:57,886 fail2ban.actions.action: DEBUG iptables -I fail2ban-SSH 1 -s 200.32.73.4 -j DROP
2007-10-26 00:24:57,891 fail2ban.actions.action: DEBUG iptables -I fail2ban-SSH 1 -s 200.32.73.4 -j DROP returned successfully
2007-10-26 00:26:57,873 fail2ban.filter : DEBUG /var/log/auth.log has been modified
2007-10-26 00:26:57,873 fail2ban.filter : DEBUG Opened /var/log/auth.log
2007-10-26 00:26:57,874 fail2ban.filter : DEBUG Setting file position to 784190 for /var/log/auth.log
2007-10-26 00:26:57,875 fail2ban.filter.datedetector: DEBUG Sorting the template list
2007-10-26 00:34:58,860 fail2ban.actions: WARNING [ssh-iptables] Unban 200.32.73.4
2007-10-26 00:34:58,860 fail2ban.actions.action: DEBUG iptables -n -L INPUT | grep -q fail2ban-SSH
2007-10-26 00:34:58,867 fail2ban.actions.action: DEBUG iptables -n -L INPUT | grep -q fail2ban-SSH returned successfully
2007-10-26 00:34:58,867 fail2ban.actions.action: DEBUG iptables -D fail2ban-SSH -s 200.32.73.4 -j DROP
2007-10-26 00:34:58,872 fail2ban.actions.action: DEBUG iptables -D fail2ban-SSH -s 200.32.73.4 -j DROP returned successfully
2007-10-26 06:07:39,998 fail2ban.filter : DEBUG /var/log/auth.log has been modified
2007-10-26 06:07:39,998 fail2ban.filter : DEBUG Opened /var/log/auth.log
2007-10-26 06:07:39,999 fail2ban.filter : DEBUG Setting file position to 784279 for /var/log/auth.log
2007-10-26 06:07:40,000 fail2ban.filter.datedetector: DEBUG Sorting the template list
2007-10-26 11:23:50,076 fail2ban.filter : DEBUG /var/log/auth.log has been modified
2007-10-26 11:23:50,087 fail2ban.filter : DEBUG Opened /var/log/auth.log
2007-10-26 11:23:50,116 fail2ban.filter : DEBUG Setting file position to 784372 for /var/log/auth.log
2007-10-26 11:23:50,123 fail2ban.filter.datedetector: DEBUG Sorting the template list
-- End--

As you can see above, there's IP being banned by fail2ban by way of iptables and after a period of time, it will be unbanned. All these can be modified in /etc/fail2ban/jail.conf

To see whether the actions really happen, see iptables rules:

iptables -L -n

Chain INPUT (policy ACCEPT)
target prot opt source destination
fail2ban-SSH tcp -- 0.0.0.0/0 0.0.0.0/0 tcp dpt:22
REJECT all -- 85.185.250.20 0.0.0.0/0 reject-with icmp-port-unreachable

Chain FORWARD (policy ACCEPT)
target prot opt source destination

Chain OUTPUT (policy ACCEPT)
target prot opt source destination

Chain fail2ban-SSH (1 references)
target prot opt source destination
RETURN all -- 0.0.0.0/0 0.0.0.0/0

Please read the documentations in the tarball for latest updates and on how to configure it. With fail2ban, it is another weapon for system administrators to combat brute-force attacks. Enjoy :)

Thursday, October 4, 2007

apt-get remove Fedora; apt-get install Debian

After giving a thought about possibility of converting my Fedora box to Debian,yesterday morning, with DVD I got from LFY, I gave it a try. Why? I fed-up with problems like crippled mp3 support (for obvious reason for a pure OSS distro),slow and error-prone yum and problem with incompatible and conflicted packages from 3rd-party repositories. My journey with Fedora has ended. Maybe I'll meet her again in the future :). We'll see.

Debian 4.0 aka Etch
Installation went smooth in text mode. It took longer as I was expecting because without my knowledge,I opted to download updates from internet during installation. There was a flaw when I tried installing LILO boot loader. The installer said it failed to install. I opted to continue and after rebooting, the boot loader was fine. GNOME was the default Window Manager installed when I select the Desktop installation but as usual, with beloved apt-get, I could install other window managers too.

Some basic commands

apt-get update <--- find new updates if any. apt-get install package_name <--- install a package. Dependencies will be taken care of. apt-get --reinstall install package_name <--- reinstall a package. apt-get remove package_name <--- uninstall a package but the config files remain intact. apt-get --purge remove package_name <--- completely uninstall a package. apt-get -u dist-upgrade <--- completely upgrade the whole distribution to the latest. dpkg -i package_name.deb <-- install a local package apt-get reminds me of slapt-get in Slackware world. slapt-get got the idea from this excellence apt-get.


A few confusing matters
Firstly, I couldn't see Firefox in GNOME or KDE menu. So I fired up apt-get. To my surprise, it had been installed. I found out that it had been 'rebranded' to IceWeasel. What a name? More info on this matter can be read here.

Secondly, I couldn't find pidgin. Instead, the old GAIM was installed. After googling, pidgin could be installed by downloading from here.

The experience so far is good. It has its share of Ubuntu which is one of my favorite distro too. I like the responsiveness of KDE and GNOME. It seems quicker than on Fedora and of course, apt-get is a lot quicker than yu
m.

Sunday, September 9, 2007

Compiz on Slackware


I installed Slackware 12.0 on an old laptop (P3 , 256 MB RAM). This laptop has no CDROM and No Floppy drive. I installed it using PXEBOOT install method introduced in Slackware 12.0. It means, I have to boot from network card to get Slackware's installer running (Disk 1). Installing packages can be done using NFS. I'll story about that next time. :-)

The laptop's vga is i830M. I can use whether i810 or intel for the driver of xorg. To run compiz was a bit tricky for this chipset. After googling for awhile, I managed to get it running good. Your mileage may vary though.

Command to run compiz :
LIBGL_ALWAYS_INDIRECT=true compiz --replace ccp && emerald &

Note : emerald is the window decorator I have chosen to run. There are other window decorators but emerald is one of the famous.

Tuesday, August 28, 2007

KSalup - Winpopup for Linux

Searching popup messaging application for Linux is not hard. Kopete has the feature but the default installation fails in receiving message. Sending message works though. Due to this problem, I try to find another application that can send and receive winpopup message via SAMBA.

Enter KSalup. I couldn't find this package in major Fedora repositories. However, it can be downloaded from the project's download page. After installation, entering basic settings like WORKGROUP, HOSTNAME, ways to find other hosts in LAN, one can use it straight away. Sending and most importantly receiving are OK. However KSalup lacks of add-on feature like some of other winpopup-like applications have, that is sending files.

Put that feature aside, KSalup is a nice winpopup application for Linux. At least you can send and receive messages with your friends who using Windows in your LAN. By not connecting to IM servers outside like Yahoo!, Google Talk, IRC or MSN, one can save a little bit of bandwidth :P.

Some screenshots


Main view

Samba settings for name lookup


Sending message setup


About

Friday, August 24, 2007

Restoring grub

Recently, I installed RHEL first with 3 partitions(/, /boot and /home) and I also created one FAT partition for installing Windows XP. After installing RHEL, I installed MS Windows XP. This left grup being replaced by MS Windows boot loader in MBR. How to restore grub?

Restoring grub boot loader should be trivial if you have the installer CD. In case of RHEL (or Fedora or CentOS), what you have to do is by inserting disc 1 of RHEL disc sets and type linux rescue. After answering a few questions, you will be dropped to console. What next? Type grub-install /dev/hda. This command will install grub boot loader into MBR.

Before this I have been googling for about an hour. The answers I found always like this:

1. chroot /mnt/sysimage
2. /sbin/grub-install --recheck /dev/hda

I had error with those steps. Step 1 means to change your root dir to installed partition which is mounted under /mnt/sysimage directory. If you have no luck, skip step 1 and go straight to step 2. Good luck!.

Thursday, August 16, 2007

RPM hung on me

Couple of days ago, I killed yumex because it hung. Afterthat, everything hung. I couldn't run rpm or yum in command line. I tried rebuilding the database with rpm --rebuild but to no avail. Found a solution after googling. The solution :

rm /var/lib/rpm/__db.*

The above command removes any locks left on the rpm database and now you should able to use rpm command. Make sure you run the above command as root for obvious reason.

Friday, August 3, 2007

Upgrading to latest clamav for impatient sysadmin :)


I've just upgraded clamav to the latest (at the time of writing is version 0.91.1) for my firewall (Mandrake 10.1). For impatient sysadmin like me, waiting for official packages to release might take longer than u might expect. So the best way to upgrade is by compiling from source. This was how I did it.

Stopping the service
It's advisable to stop clamav service before installing the new one.

service clamd stop

Downloading the package
wget http://freshmeat.net/redir/clamav/29355/url_tgz/clamav-0.91.1.tar.gz

Extracting the package
tar xzvf clamav-0.91.1.tar.gz

Configure...
cd clamav-0.91.1
./configure --prefix=/usr --sysconfdir=/etc --localstatedir=/var --enable-id-check --enable-dns-fix --enable-bigstack

Note: this configure arguments matching with the previous installation by rpm except for --enable-big-stack and --enable-dns-fix (I think).

Compile and install
make
make install (as root)

Restart the service
service clamd start

Updating the virus database definition
freshclam

Checking clamav version
clamav-config --version

Friday, July 27, 2007

Writing a blog entry has never been easier

This blog entry was created using Gnome Blog. Without going to blogger.com, I can now write an entry by just opening this application. It's good to have this kind of app don't you think? Oh, you can insert pictures too by way of drag and drop (look at cutie meowie below :) ). --update: you can't see the picture because BloggerAPI doesn't support it (yet).


Where to get it?


You are recommended to use your distro's package manager. Just search for gnome-blog or something like that. In Fedora just run yum install gnome-blog.

More info can be found here.


Wednesday, July 18, 2007

dbmail 2.2.6-rc1 released

I have just upgraded my dbmail to dbmail 2.2.6-rc1.

Announcement : http://www.gossamer-threads.com/lists/dbmail/users/22531
Changelog : http://nfg3.nfgs.net/cgi-bin/gitweb.cgi?p=dbmail.git;a=log;h=dbmail_2_2
Download : http://www.dbmail.org/download/2.2/dbmail-2.2.6-rc1.tar.gz

How to upgrade from previous release (2.2.5)

1. Stop postfix, dbmail-imapd, dbmail-lmtpd and dbmail-timsieved using service command.
2. Download the tarball and extract it.
3. Enter the installation folder and run :

./configure --prefix=/usr --sysconfdir=/etc --localstatedir=/var --with-mysql --with-sieve

4. make
5. make install
6. Restart all the stopped services.

That's all there is to it.

Tuesday, July 10, 2007

df - A disk usage reporting tool

What is df?
It is a command to report filesystem disk space usage (on Linux).

Problem
Recently I checked my backup server's disk space. I issued df for that. The output was:

df: cannot read table of mounted filesystems: No such file or directory

Something wrong here. After some googling, I managed to get the solution. I issued this command:

grep -v rootfs /proc/mounts > /etc/mtab

After running this command, df worked again. One lesson learned. df relies on /etc/mtab for it to work. Now I can easily know how much disk space left for each partition. Thanks df!.

Tuesday, June 26, 2007

Compiz Fusion - the merge of Compiz and Beryl

What is Compiz Fusion?
Compiz Fusion is an extension of the Compiz compositing window manager for the X Window System. It was created from the remerging of Beryl into Compiz. It aims to port almost all of the features of Beryl to Compiz plugins, and continue to improve Compiz's core functionality.

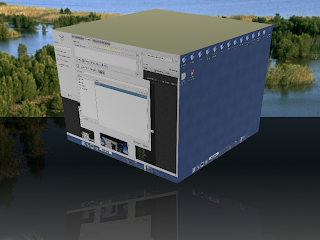
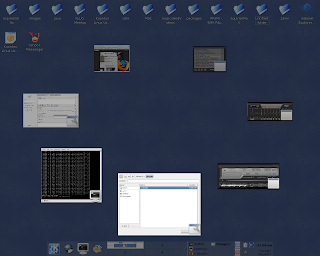
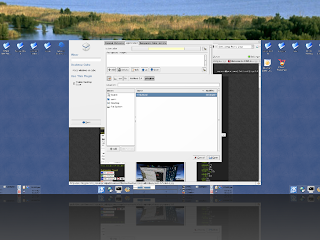
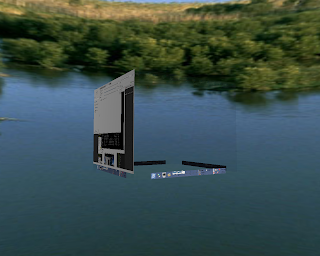
Some screenshots (taken from my desktop):


Installation

This package is not officially included in main repository of Fedora. It is even conflicts with the official compiz package. For Fedora users, you can install it through yum with kageshensi's repo. Instructions are in there. Ubuntu users may want to check Ubuntu Forum for more info. Click here for a start.

Friday, June 22, 2007

Converting video and extracting audio from a video

Converting video formats into another

To convert mkv format to dvd format:

ffmpeg -i myfile.mkv -target dvd -copyts -aspect 16:9 myfile.mpg

To convert mp4 video to avi:

mencoder video.mp4 -ovc lavc -vf scale=352:288 -oac lavc -o video.avi

To convert avi to mpeg video:

ffmpeg -i video.avi -target pal-vcd video.mpg

or

ffmpeg -i video.avi -target pal-vcd -s 352x192 -padtop 32 -padbottom 32 video.mpg

Note: -target pal-vcd is for PAL. For NTSC, use -target ntsc-vcd. -padtop 32 and -padbottom 32 will add black padding at the top and bottom.

In certain cases, if you have problem with de-sync audio for the resulted mpeg, try using mencoder like this for PAL format VCD:

mencoder -oac lavc -ovc lavc -of mpeg -mpegopts format=xvcd -vf \
scale=352:288,harddup -srate 44100 -af lavcresample=44100 -lavcopts \
vcodec=mpeg1video:keyint=15:vrc_buf_size=327:vrc_minrate=1152:\
vbitrate=1152:vrc_maxrate=1152:acodec=mp2:abitrate=224 -ofps 25 \
-o movie.mpg movie.avi

More options can be found here.

To convert avi to SVCD format:

ffmpeg -i video.avi -target pal-svcd video.mpg

Note: -target pal-svcd is for PAL. For NTSC, use -target ntsc-svcd.

Burn to CDs
This command will cut the mpeg video files into 3 to fit 3 CDs.

mpgtx -3 video.mpg -b m

The resulting file will be m-1.mpg, m-2.mpg and m-3.mpg. These files can be burnt to one CD each. The argument -b means basename.

or you can also use avisplit to split AVI movie:

avisplit -s 700 -i video.avi

Where to get the tools?
If you use Fedora, you can install all of the tools with yum. For other distro, please consult the manual for it. avisplit is part of transcode package.

Fixing desynched audio

avisync is easy to use: just provide an input file (-i name.avi), an output file (-o newname.avi) and the synchronization offset in frames (-n count). From avisync's help: count>0: audio starts with frame 'count'. count>0: prepend 'count' padding audio frames.

An example:
avisync -i ally-not-synched.avi -o ally-synched.avi -n -2

Splitting AVIs

avisplit -i ally-big-file.avi -o ally -s 700

This will produce files named ally-0000.avi, ally-0001.avi etc. that are each 100megs big at most.

Extracting audio from VOBs/MPEGs/AVIs

MPlayer can be used easily to extract sound. The -vo null options tells MPlayer not to show the video.
I'm not listing all possible options. Generally use -dumpaudio -dumpfile newaudio.extension if you want to extract the audio without processing and -ao pcm -aofile newaudio.wav if you want the WAV itself.

Using separate audio files

Sometimes you want to play another audio file along with your video. MPlayer makes this rather easy: mplayer -audiofile anotherlang.mp3 myvideo.avi plays video from myvideo.avi and audio from anotherlang.mp3. A lot of Windows media players support external audio files, too. This way you can provide several language versions as separate audio files. A combination often used is to have the AVI include the English audio track and to provide additional audio tracks in separate files.

A visual AVI editor: avidemux

If you've done video editing with Windows before you probably know the excellent OpenSource editor VirtualDub. An OpenSource utility for Linux that aims at providing the user with a similar set of features is avidemux. You can use it in order to easily cut specific parts from a movie, to apply filters, to reencode movies and to do a lot more. I suggest you take a look at it even if using the command line is as natural to you as it is for me.

Credit to :
moritz@bunkus.org (http://www.bunkus.org)
Gentoo Wiki (http://gentoo-wiki.com/HOWTO_Create_a_VCD_or_SVCD)
MPlayer Doc (http://www.mplayerhq.hu/DOCS/HTML/en/index.html)

Friday, June 8, 2007

yumex - yum extender

Installing a package in Fedora using yum is good. It is faster than pirut or pup in GUI. I discovered yumex a while ago. Installing it was trivial :

yum -y install yumex

It is a GUI-front-end for yum but faster than pirut or pup. The Ouput View gives you "what's going on'. I just love it. Try it!.


To make installation packages faster with yum, I highly recommend you to install the following yum plugins :
  1. yum-fastestmirror (yum install yum-fastestmirror)
  2. yum-skip-broken
To see other plugins for yum, please run this command: yum list "yum*"

Thursday, May 24, 2007

Capturing video off your desktop with xvidcap on Linux

What is xvidcap?
It is a small tool to capture things going on an X-Windows display to either individual frames or an MPEG video. On Windows machines there are commercial tools like Lotus ScreenCam or Camtasia. From my experience, new user will take some time to take off with a video. I just think it needs more work on user-friendliness.

Where to download?
If you use Fedora, you can install with yum: yum install xvidcap
If u use Ubuntu or Debian, you can install with apt-get : apt-get install xvidcap
or for advanced user, you can download the source code here.

My desktop
Below is a video off my desktop I took with xvidcap. On the video, you can see that I was showing off Compiz. :)

Saturday, May 19, 2007

Dansguardian - web content filtering for all


What is dansguardian?
(Excerpt from dansguardian's website)

DansGuardian
is an award winning Open Source web content filter which currently runs on Linux, FreeBSD, OpenBSD, NetBSD, Mac OS X, HP-UX, and Solaris. It filters the actual content of pages based on many methods including phrase matching, PICS filtering and URL filtering. It does not purely filter based on a banned list of sites like lesser totally commercial filters.

DansGuardian is designed to be completely flexible and allows you to tailor the filtering to your exact needs. It can be as draconian or as unobstructive as you want. The default settings are geared towards what a primary school might want but DansGuardian puts you in control of what you want to block.

DansGuardian is a true web content filter.

Where to download?

The latest beta when this article is published is 2.9.8.5. Download it here. Beta doesn't mean it is unstable. From my experience, it is a very reliable piece of software. Downloading source code and compile it yourself is the best way to take full advantage of its (latest) capabilities and speed.

My setup
I have more than 200 clients in my network. To provide a fast and reliable internet connection, I have to use a proxy server and dansguardian is used for filtering unwanted websites and scanning for viruses of downloaded files and websites.

Startup script
Startup script can be taken from [source dir]/data/scripts/systemv-init. Copy it to init.d:

~#cp systemv-init /etc/init.d/dansguardian

Run chkconfig to make it start across booting properly:

~#chkconfig --add dansguardian
~#chkconfig --level 35 dansguardian on

Note: For Fedora users, you may need to use /sbin/chkconfig instead of chkconfig.

How to upgrade?
If you have installed dansguardian via package manager, it is easy to upgrade it with package manager too. So you don't need to mess up with compilation and dependencies. It will take care of them for you. I like to download source code because I can download the latest and to take the advantage of its speed. You can not always get the latest packages with package manager and the package may not optimized for your machine. YMMV.

Steps:
1. Download the latest source code.
2. Extract it: tar xzvf dansguardian-2.9.8.5.tar.gz
3. cd into the source dir.
4. configure : ./configure --prefix=/usr --sysconfdir=/etc --localstatedir=/var --enable-clamd=yes
5. Run make : make
6. Install : make install

If you have previous version of dansguardian, please backup directory /etc/dansguardian/lists because installing the new one will overwrite all the files in it. You don't want to refill all the sites you have entered in all files in there for banned sites , exception site (unfiltered sites) etc2.

Configuration
The main configuration file for dansguardian is /etc/dansguardian/dansguardian.conf. It is heavily documented. Tkae your time to read the comments in there before modifying. Below is the most important directives to be modified (example):

filter_ip = 192.168.5.2
filter_port = 3128
proxy_ip = 127.0.0.1

Note: 192.168.5.2 is the IP which dansguardian will listen on. If left empty, it will listen on all IPs. For increase security, please state IP(s) that it needs to listen on. filter_port is the port it will bind to. proxy _ip is the ip where the proxy server (daemon, e.g squid) listens on. Note that you must run proxy server before running dansguardian or it will fail to start.

Integration with antivirus
Dansguardian can use antivirus for content scanning of viruses. I use clamav for this. You need to uncomment the directive contentscanner and modify file /etc/dansguardian/contentscanners/clamdscan.conf.

contentscanner = '/etc/dansguardian/contentscanners/clamdscan.conf'

In this file, change clamdudsfile like this :

clamdudsfile = '/tmp/clamd'

/tmp/clamd is the socket file for my clamav daemon (clamd). Change it accordingly.

Saturday, April 28, 2007

Repositories for Fedora Core 6


Fedora Core is in rapid development. Repositories or in short repos (plural of repo) are servers which provide packages for Fedora Core users to install and update packages. For those who likes to live on the edge should enable testing repo. For newbie, you can use pirut or go to Application --> Add/Remove Software and enable the testing repo. Be warned that the packages provided are not stable. They can even make your computer system hang and your CD drive burnt ;). I don't like it. I like everything to be stable and I have experienced how it was to be living on the bleeding edge. Things were not that good. :D

Beside core, updates and extras repositories, you might need to add livna and kde repositories too. These sites provide non-free/proprietary packages like mp3 support and proprietary display drivers (ATI and NVIDIA). The kde repo stated above provides unofficial kde packages from kde community itself. The packages comes as updates for the packages provided by official Fedora repo.

To add livna repo, run this command :
rpm -ivh http://rpm.livna.org/livna-release-6.rpm

To add kde repo, download this file using wget:
wget http://apt.kde-redhat.org/apt/kde-redhat/fedora/kde.repo

and put this file in /etc/yum.repos.d/

Afterthat, try checking updates by running yum check-update. You should see many updates come from both repos.

Friday, April 6, 2007

Setting up wireless with Mandriva 2007

I rarely install Linux on laptop. It was great to have one and saw how Linux distros progressed in this area. Since last week, I have been a responsible person for one of my office's laptop. I tried installing Fedora Core 6 on it. It was no good. After a couple of minutes, it started to become slower like something was going on in the background. It was so annoying. I tried upgrading the kernel and all the latest updates using yum but to no avail. Of course your mileage may vary.

Mandriva 2007
With Mandriva 2007, I was in luck. I got the DVD from LinuxForYou magazine. I am no stranger with Mandriva. I have been using it for 5 years and one of servers I managed using it. As any desktop-oriented distros, Mandriva is one of the user-friendliest distros out there. It is good and will be better in the future.

Wireless
My laptop is Intel-based. What i mean here is the wireless, CPU and VGA chipsets are from Intel. My wireless is ipw3945. No driver for this chipset I could found in the DVD. After googling, the driver is here. This is the kernel module (driver) for the wireless chipset. Hence, I activated it with modprobe : modprobe ipw3945. It created a device called eth1 (eth0 was reserved for wired connection).

Connecting to AP
Open Mandriva Control Center and go to Network And Internet:
Click on the Wireless connection.


As you see in the diagram below, the AP signal was detected and shown. The button Disconnect should be Connect before you connect your laptop to the AP.


If the connection is successful, then you can connect to your network and internet. Contact your network administrator if you have problem. Good luck.

Friday, March 23, 2007

Setting up a printer with CUPS

Printing with Linux has never been easier with CUPS. I had bad experience long ago with lpr and lprng before when printer support was still scarce. Nowadays, setting up a printer on Linux is like a 'walk in the park'. Thanks to CUPS.

HP LaserJet 1020
In my office, my pc is the only pc running Linux (FC6 to be specific) and the others are (you bet!) Windows (XP Pro Edition to be specific). My colleague sitting nearest to me is a webmaster. Her pc is connected to an HP LaserJet 1020 printer and shared with name HP1020.

Get ready the required packages
I need to print to that printer. So I decided to install SAMBA and CUPS packages for that purpose.

Finding the driver
DON'T use the driver for this printer packaged with FC6. It won't work. I tried it but I think you must try it too to prove me wrong. Of course YMMV. The driver is here. Before that, you have to read what the author's have to say on the website. It's important!. Follow the instructions on how to compile and install the ICM and the firmware files. Included in the tarball is the PPD file for working with the printer.

Connect to the printer
Once all the above completed, add the printer to cups so that she knows where to send files for printing.

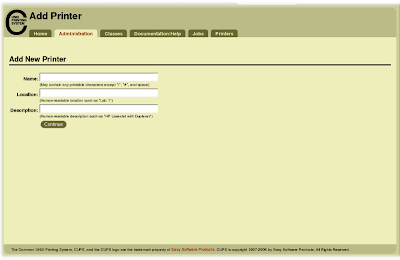
Put the name, location and description for the printer. At this stage, it won't set the 'real' things yet.


Select the device for the printer. It obviously "Windows Printer via SAMBA".

The device URI should be in this form : smb://servername/sharename or smb://Workgroup/servername/sharename. To know the sharename, you can use this command to list all shared folder on the server servername: smbclient -L servername

At this stage, click Browse button and find the PPD file in the folder where you extract the tarball. Find the folder named PPD in there and click on the file named HP LaserJet 1020.ppd or a file named after your printer model and then click Add Printer. Now you are done setting up the printer in CUPS system. To see whether the printer has been added to the system, click Printers tab. If it is listed, then you are now good to test the printer by clicking on Test Printer button. For now, the driver supports printing in Black and White only. Works are in progress though to support color printing.

Good luck.

Tuesday, March 13, 2007

Setting up webcam on Linux (ZC0301)


It was a rare occasion if I got my hand on a web camera. This time I borrowed it from my colleague. Last time I couldn't get it to work. I didn't remember why. But this time, it was easy as ABC.

Spec:
Model : Z-Star Microelectronics Corp. Havit 3808 (this is what it says on the tin)
Chipset : ZC0301 (from lsusb)

Last time I looked at http://zc0302.sourceforge.net/ for the driver. It has been inactive for a long time. Still so far, the driver for ZC0301 is still not supported.

This time: I looked at spcaxx project page at http://mxhaard.free.fr/spca5xx.html. The webcam I was using supported. As stated on the website, for Fedora Core 6 users like me can download the driver here. The driver is actually a kernel module and after installing it, you can load the module with modprobe : modprobe gspca

When done, open your kopete, and click Settings --> Configure.. --> Device and see whether it detects and display video from the webcam. Then you can enjoy webcam session with your friends and acquaintances.

Good luck!

Tuesday, February 27, 2007

postfix - mailbox size limit and message size limit

postfix is my MTA of choice. I use it for my mailserver because its simplicity , security and sendmail-compatible (the widely used smtp in the world but not as secure). It is also extensible by plugging other servers for various purposes (antispam, antivirus,database etc).

I had one problem with file attachment larger than 10MB. Users couldn't send it although I have setup squirrelmail (SM) to be able to attach files summed up more than 20MB and I had modified php settings as per here. The problem was not in SM setting. It was postfix. By default, attachment size that can be sent by postfix is 10MB ~ 10240000 byte. How did I know it? I looked in log file (for my system it is in /var/log/mail/errors. For other system, the file to look is /var/log/maillog). The line looked like this:

Feb 26 16:30:53 webmail postfix/sendmail[30775]: fatal: me@mymailserver.org(74): Message file too big


Solution
Open /etc/postfix/main.cf with a text editor of choice and find message_size_limit directive and change accordingly. If it is not there, add the directive like this:

message_size_limit = 20480000

This sets limit to 20MB.

Some other parameters you need to change are in file php.ini which is usually located in dir /etc. Set their parameters as above or higher values as below:

post_max_size = 20M
upload_max_filesize = 20M

reload or restart postfix when you're done:


service postfix reload

or

service postfix restart

There's also mailbox_size_limit directive. You need to change this if SM can not open mailbox sized more than 10 MB.

reference :
http://www.tek-tips.com/viewthread.cfm?qid=1073614&page=1

Sunday, February 25, 2007

Tips for MySQL

MySQL is the most popular database in the world. I'm not doubt about it. Most of forums, portals and web-based database applications use it as the back-end engine.

Some tips of using MySQL on Linux

Login to MySQL using mysql client in console/terminal:

mysql -u username -p dbname

or

mysql -u username -ppassword dbname

or (using current username to log in)

mysql -ppassword dbname

security tip: username root is the default administrator. Do not use it in a live environment. Create a new one and set the appropriate permission for it.

Create a new database:
mysqladmin -u username -ppassword create databasename

(username is the administrator username that able to create a new database ie root)

or you can log in to mysql using mysql client in console. Example:

//create table with myisam engine.

CREATE TABLE mytable (
id INT NOT NULL AUTO_INCREMENT,
PRIMARY KEY (id),
value_a TINYINT
) TYPE=MYISAM


//create table with HEAP engine.

CREATE TABLE mytable (
id INT NOT NULL AUTO_INCREMENT,
PRIMARY KEY (id),
value_a TINYINT
) TYPE=HEAP

Delete a database:
Login to mysql and issue command drop database databasename.

(Make sure you use usernames with correct priviledge to drop a database)

What is the size of my database?
database size = the sum of all table sizes + all index sizes
  1. Open a text editor (eg. Notepad)
  2. Copy and paste the code below into your text editor ( replace username, password and dbid accordingly):

    mysql database size

    if ($filesize < filesize ="">

    # in at least kilobytes.

    for ($i = 0; $filesize > 1024; $i++) $filesize /= 1024;

    $file_size_info['size'] = ceil($filesize);

    $file_size_info['type'] = $bytes[$i];

    return $file_size_info; } $db_server = 'mysqlhost'; $db_user = 'username'; $db_pwd = 'password'; $db_name = 'dbid';

    $db_link = @mysql_connect($db_server, $db_user, $db_pwd)

    or exit('Could not connect: ' . mysql_error()); $db = @mysql_select_db($db_name, $db_link) or exit('Could not select database: ' . mysql_error());

    // Calculate DB size by adding table size + index size:

    $rows = mysql_query("SHOW table STATUS"); $dbsize = 0;

    while ($row = mysql_fetch_array($rows)) {$dbsize += $row['Data_length'] + $row['Index_length']; } print "database size is: $dbsize bytes "; print 'or';

    $dbsize = file_size_info($dbsize); print "database size is: {$dbsize['size']} {$dbsize['type']}"; ?>


put this php script into your accessible directory. (taken from here).

Nice reading : Overcoming MySQL's 4GB limit by Jeremy Zawodny.

To know what engine your database is using:

SHOW TABLE STATUS FROM yourdbname

MySQL has support for ISAM,MyISAM , HEAP, BerkeleyDB and InnoDB database engine. Depending on how your MySQL packages are compiled, it may or may not support for all these engines.

Bear in mind that ISAM and MyISAM engines lack foreign key and transactional support. BerkeleyDb and InnoDB overcome that limitation. However, BerkeleyDB and InnoDB are much slower compared to ISAM and MyISAM. If your database is of type ISAM/MyISAM, fortunately you can convert it to InnoDB using this command:

ALTER TABLE isamtable CHANGE TYPE=InnoDB

or you can use utility mysql_convert_table_format :

mysql_convert_table_format --user=username --pasword=password --type=innodb databasename tables

(if tables is omitted, all tables will be converted. That means you can convert certain tables to InnoDB and leave the rest with ISAM. One database uses more than one engine. That's the flexibility MySQL provides. Flexibility is the key here.)

MySQL makes this happen with three steps. First, an exact copy of the table is created. Next, any incoming data changes are queued, while the copy is moved to the other engine. Finally, any queued data changes are committed to the new table, and the original one is deleted.


Thursday, February 15, 2007

yum - 'yummy' package management for Fedora Core

As a Mandriva (aka Mandrake) user, I used to use urpmi to install, urpme to remove and etc2 for package management. As a Slackware user, I used to use slapt-get and in Fedora, I am learning yum. I love it but in commandline. Why? because it is faster that way than using the gui front-end. I don't know why but they need to improve its speed.

Some useful examples of usage :

Check available updates (without installing anything) : yum check-updates
Check updates and install : yum -y check-updates
Search for a particular package using wildcard : yum list "ogg*"
Installing particular package : yum install ogg-vorbis.blablaba.fc6.rpm
Upgrading a package : yum update ogg-vorbis.blablaba.fc6.rpm

Default repositories provided by FC6 is good enough but lack of commercial and copyrighted packages. You need more than that. Notable repositories are freshrpms and livna. I personally added freshrpms as one of the repositories used by yum to install xmms-mp3, mplayer, dvdrip and some other packages. Thus enables me to hear mp3 and watch movies. I just found out that adding fedora's update-testing repository is risky. Don't add it unless you want to live at the bleeding edge and could afford to lose all your data. :)

How to add 3rd-party repos?
Usually there are instructions on the websites on how to add their repos into your system or you can read my article on how to add livna and kde repositories. I read somewhere to not add both livna and freshrpms repos. Add ONLY one of them or conflicts of packages will happen. You have been warned!.

To add freshrpms repo, just run this command as root:

yum install http://ftp.freshrpms.net/pub/freshrpms/fedora/linux/6/freshrpms-release/
freshrpms-release-1.1-1.fc.noarch.rpm (all in one line.)

Tuesday, February 6, 2007

On a quest to get a 3D desktop part 2


You might still wondering whether i am still on a quest to get a 3D desktop? Not really. After reading an article of Fedora Core 6 in LinuxFormat magazine, I thought I need to give it a try. Firstly, I tried it on a laptop with built-in graphic card Intel 915. It ran smoothly. 3D effects for compiz and beryl worked out of the box. I just had to activate it.

After too much coin tossing and coffee, I decided to give FC6 a try on my office's PC. After backing up all important files, I inserted the DVD and rebooted into the nice Fedora installer a.k.a anaconda. I decided to repartition my drive to give larger part for my / partition and created 3 more partitions for /home,/boot and of course a /swap. As a rule of thumb, /swap size is 2 times RAM size.

GNOME is some sort of 'official' window manager for Fedora and RedHat. That's why after booting into X, GNOME was loading. To get 3D effects, click on System -> Preferences -> Desktop Effects. This was compiz actually loading replacing metacity. Future release of GNOME and KDE will support 3D effects on the fly. As for time being, compiz or Beryl compositing window manager provides the effects. Beryl provides much more effects as anyone could imagine. Experiment it and you will be amazed what it can do. The 3D cube is superb!.

Now the quest has ended. The 3D desktop is mine!. Try it.

Some tips for beryl :
F9 or place mouse cursor at the topleft corner - tiled windows in a viewport
Ctrl+Alt+LeftArrow - spin cube to the left
Ctrl+Alt+RightArrow - Spin cube to the right
Ctrl+Alt+Shift+RightArrow/LeftArrow - Spin cube to the right or left with active window follows.
place mouse cursor at the bottomright corner - centers active window.

Wednesday, January 31, 2007

Google search tool collections


Google indexes and searches billions of webpages and is the premier search engine on the internet. A quick analysis of the search page essentials of Google Search and remember to set your preferences. is helpful to understand and analyze the search results.

Official Google Search Tools

Special Searches

  • Google Video - Search TV programs and videos
  • Google Image Search - comprehensive image search on the web
  • Google Music Search - search for music
  • Google Book Search - Search the full text of books (and discover new ones).
  • Google Catalogs - helps you browse and search merchant-provided catalogs
  • Froogle - Google's shopping search engine
  • Google News - Search and browse 4,500 news sources
  • Google Scholar - search for the most relevant research across the world of scholarly research.
  • Google Maps - View maps, get driving directions, and search for local businesses and services.
  • Google Public Service Search - offers educational institutions and non-profit organizations worldwide free SiteSearch, which enables users to search your website, and free WebSearch, which enables users to search the Internet.
  • Google's University Search - enables you to narrow your search to a specific school website for things like admissions information, course schedules, or alumni news.
  • Google Ride Finder - view taxi or shuttle locations in several cities.
  • Google Base - submit all types of online and offline content that is hosted and made searchable online.

Google Topic Specific Search

Google For Webmasters

  • Google AdSense for search - Opportunity to earn money by Google whenever your users click on the targeted Google adsense ads on search results pages.
  • Google Free - provide Google search results to users who want to search the web or just your website.
  • Site-flavored Google search - delivers web search results that are customized to individual websites.
  • Customizable Google Search - you can customize your results display to include background, text and link colors you select.
  • Google Search Appliance - is a hardware and software product designed to offer large businesses the productivity-enhancing power of Google search.
  • Google Mini â€" Google search for your website and intranet

Google Desktop Search Tools

  • Google Deskbar - Search using Google without opening your browser
  • Google Desktop - a desktop search application that provides full text search over your email, files, music, photos, chats, Gmail, web pages that you've viewed.

Google Mobile Search Services

Google Search Toolbars

Third party Google Search Tools

Search Google with Firefox Extensions

  • CustomizeGoogle - enhances Google search results by adding extra information (like links to Yahoo, Ask Jeeves, MSN etc) and removing unwanted information (like ads and spam).
  • Googlebar Lite - A light-weight Google search toolbar for Firefox.
  • GoogleTabs - Adds a context menu option to open Google search results in tabs.
  • Advanced Dork - Highlight a word or phrase, right click, and choose from over 15 Advanced Google Operators, A google search page is opened in either the same tab or a new tab, the results contained in the search will contain the highlighted text inside the chosen Operator.
  • GooglePreview - Inserts preview images (thumbnails) of web sites and Amazon products into the Google and Yahoo search results pages.
  • Feeling Lucky - Performs Google's "I'm Feeling Lucky" search with any selected text and opens the result in new a tab.
  • Aggregate Yahoo! and Google - Search Yahoo and Google simultaneously
  • GooglebarL10N - is the localized version of Googlebar with Menues & Texts in German, Italian or Spanish.
  • Google Advanced Operations Toolbar - provides a shortcut to some of Google's advanced search functions.

Google Page Modules / Scripts / Widgets / Bookmarklets

Multi Search Tools

  • Simply Google - search all Google services on one page. Lots of forms.
  • HotDaddy - search all Google services on one page. Lots of icons.
  • Google Total - search all Google services on one page. Drop down menu.
  • GahooYoogle - search multiple Google and Yahoo services together side by side.
  • Twingine - Google and Yahoo search side by side.
  • Soople - performs all advanced search functions of google in separate forms

Miscellaneous Google Search Tools

  • Google Cloud new1.gif - displays search results as a tag cloud
  • Babelplex - enables users to search Google's web index across two languages.
  • Google Current - airs every half hour on Current TV and provides a look at what the world is searching for on Google.
  • Googlewhack - a query consisting of two words (without quotation marks) entered into Google's search page that returns a single result.
  • Cookin' With Google - allows you to provide a list of ingredients and get back a list of recipes that Google finds for you.
  • Goofresh - is a way to search for sites added today, yesterday, within the last seven days, or last 30 days.
  • Google Fight - Compare the number of results for two competing keywords.
  • GoogleDuel - a popularity contest using the Google search engine.
  • Random Web Search - it generates a random word, then searches that word on the web using Google.
  • Googlematic - Enables searching of Google via AIM or MSN Messenger.
  • Googlism - will find out what Google.com thinks of you
  • Google Tool - Search multiple google datacenters simultaneously.
  • elgooG - a mirror image of Google
  • LostGoggles - adds search site preview images, Amazon pricing, site info links and the Open-in-New-Window-button. Formerly "More Google".
In the end, this amazing list of Google Web Search Features lists the many special features to help you to find exactly what you're looking for. Google Zeitgeist lists the current Google Search patterns, trends, and surprises.

Second monitor no display after latest update - KDE-neon

 After latest update as of Oct 3, 2023, my second monitor was undetected with latest kernel (6.2.0-33-generic). If I boot with previous kern...