Friday, January 5, 2007

Happy New Year 2007

We are now in 2007. Happy New Year for everybody. The time seems running fast.

Let us hope this year will bring us happiness and success. 

Sunday, December 24, 2006

Setting up name-based virtual host on apache

I just finished setting up name-based virtual host for one of my clients. The server is Red Hat Linux Enterprise 4 update 4 (RHEL) with public IP. After I have successfully setting up DNS server correctly in particular to access to this server, this is how I setup name-based virtual host for it.

What is name-based virtual host?
A feature for webserver (ie apache,IIS etc) to serve many websites with one IP. The server will serve webpages accordingly based on the name of the site (ie www.example.com , mail.example.com , blog.example.com etc2).

Let's do it.
This tip is for Red Hat and maybe the same for Fedora Core (FC). On Mandriva and other distros, the directive to change may be in different files and different folders.

Step 1
Open up /etc/httpd/conf/httpd.conf with your favorite text editor (I personally use joe in console).

Step 2
Coment out this line:

NameVirtualHost *:80


Step 3
Comment out these lines (in the VirtualHost containers and change accordingly to your server name:

ServerAdmin testuser@example.com
DocumentRoot /var/www/html/
ServerName www.example.com
ErrorLog /var/log/www.example.com.log
CustomLog /var/log/www.example.com.common.log common


ServerAdmin testuser2@example.com
DocumentRoot /var/www/html/email
ServerName mail.example.com
ErrorLog /var/log/mail.example.com.log
CustomLog /var/log/mail.example.com.common.log common

Note:
See the DocumentRoot directive in each VirtualHost container. It is different. And also see the difference of ServerName directive. It is used by Apache to differentiate the website served based on the name.

Step 4
Restart apache by issuing "service httpd restart" in console (without the double quote). Notice any error if any.

Step 5
Now you can try accessing your server with www.example.com and mail.example.com. See if it serves the right page. If yes, congratulations. You have successfully done it.

That's all there is to it. Have fun.

Wednesday, December 13, 2006

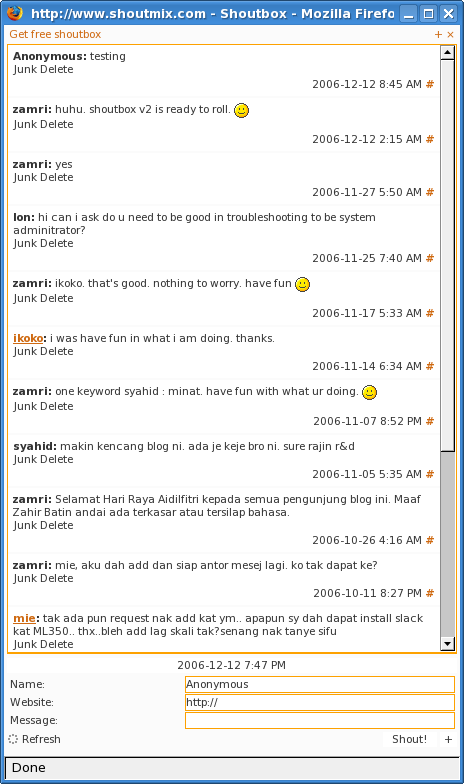
The new ShoutMix ShoutBox v2


At last the long awaited ShoutMix ShoutBox v2 is ready for prime time now and this time AJAX is used for real time update. It has many new features though. To know more, please register at shoutmix site and explore yourselve. For heavy or corporate users, you are encouraged to register as a premium user with affordable price and enjoy more features.

More news here and here.

Thursday, November 2, 2006

connecting to SSH server passwordless

If you have to connect to an SSH server frequently or you want to make a shell script using ssh, you might want to consider connecting to it passwordless. This trick is now new. I have heard about this long time ago but didn't have any necessity for it so I ignored it until recently.

by the time of this writing, I have just completed my script for backup using SSH passwordless. Here I want to share the way I did it in a simple way. I hope it benefits others. Bear in mind that, all ssh utilities like sftp, scp and ssh can use passwordless connection once we complete setup one.

Step 1
  • Connect to SSH server and open up sshd_config in /etc/ssh or equivalent. Check your distro documentation.
  • Make sure you have the following entries:
    # Allow Identity Auth for SSH1?
    RSAAuthentication yes

    # Allow Identity Auth for SSH2?
    PubkeyAuthentication yes

    # Authorized Keys File
    AuthorizedKeysFile ~/.ssh/authorized_keys
Step 2
  • Make RSA keys using ssh-keygen in your home directory of ssh client.
    $ cd ~  
    $ mkdir identity-test
    $ cd identity-test
    $ ssh-keygen -f id_rsa -t rsa
    Generating public/private rsa key pair.
    Enter passphrase (empty for no passphrase):
    Enter same passphrase again:

    Your identification has been saved in id_rsa.
    Your public key has been saved in id_rsa.pub.
    The key fingerprint is:
    c3:af:e9:6c:2f:19:4d:b5:1a:a9:40:06:54:e6:60:08 me@localhost
  • look at the created files
    $ ls
    id_rsa id_rsa.pub

    The id_rsa.pub contains the public key and id_rsa contains private key.
  • copy the content of id_rsa.pub to ~/.ssh/authorized_keys
    Two ways to achieve this
    1. login to ssh server and paste the content into the file
    2. using scp to copy the content into the file
  • So, let's test logging in with this key. Since we have put the test key in a non-standard place, we will need to reference it explicitly on the command line:
    $ ssh username@server -i ~/identity_test/id_rsa
    $username@server$ hostname
    $server
    $username@server$ exit

    $ ssh username@server -i $HOME/identity_test/id_rsa "echo Success!"
    Success!
    $
  • In the above examples, if you can login without password then the setup is a success. If not, please recheck the setup.
Have fun ssh'ing :)

Monday, October 2, 2006

An encounter with VLAN

2 days ago, I helped my friend setting up internet connection for his office's LAN. As he showed me the network diagram, I realised that there are 6 VLAN that I need to cover to make them connect to the internet.

6 VLANS-->CORE SWITCH-->ROUTER+PROXY+DNS-->GATEWAY-->INTERNET

The problem was to get the clients in each VLAN to communicate each other and to communicate with router. All clients should also be able to access dhcp server located in one of the VLANS. After struggling about two days, I managed to get all clients in different VLANS talking to each other and the router. The problem was that I didn't understand how each VLAN talk to each other. The solution was located on coe switch. The commands below did the job:

route add -net 172.20.10.0 netmask 255.255.255.0 gw 172.20.30.254 eth0
route add -net 172.20.20.0 netmask 255.255.255.0 gw 172.20.30.254 eth0
route add -net 172.20.30.0 netmask 255.255.255.0 gw 172.20.30.254 eth0
route add -net 172.20.40.0 netmask 255.255.255.0 gw 172.20.30.254 eth0
route add -net 172.20.50.0 netmask 255.255.255.0 gw 172.20.30.254 eth0
route add -net 172.20.60.0 netmask 255.255.255.0 gw 172.20.30.254 eth0

If you can see above, the gateway is the same to be able all VLANs talking to each other and .30.254 is the gateway of the router.


route add default gw xxx.xxx.xxx.xxx

xxx.xxx.xxx.xxx is the gateway public IP (usually a modem). Don't forget that the router should enable ip forwarding. change it in /etc/sysctl.conf and run sysctl -p to make it effective. NAT and forward table really depends on it.

iptables and squid
I setup squid for faster internet access and save internet bandwidth. For each VLAN, we have to make rules.

iptables -t nat -A PREROUTING -s 172.20.10.0/24 -p tcp --dport 80 -j REDIRECT --to-ports 3128
iptables -t nat -A PREROUTING -s 172.20.20.0/24 -p tcp --dport 80 -j REDIRECT --to-ports 3128
iptables -t nat -A PREROUTING -s 172.20.30.0/24 -p tcp --dport 80 -j REDIRECT --to-ports 3128
iptables -t nat -A PREROUTING -s 172.20.40.0/24 -p tcp --dport 80 -j REDIRECT --to-ports 3128
iptables -t nat -A PREROUTING -s 172.20.50.0/24 -p tcp --dport 80 -j REDIRECT --to-ports 3128
iptables -t nat -A PREROUTING -s 172.20.60.0/24 -p tcp --dport 80 -j REDIRECT --to-ports 3128

Note that 3128 is the squid port.

That's it. Now the clients on every VLAN can access to the internet and communicate with each other.

Tuesday, September 19, 2006

ping using netbios name from Linux box

I have a linux box in a LAN with almost other boxen are MS Windows ME/XP. This Linux box acts as a WINS server serving request from LAN for netbios information. I can get the name of pcs in my workgroup using smbclient -L mywinsserver but I didn't know the ip address of each client. I would like to ping the name of a client pc using netbios names. How to overcome this? I got this simple solution from the net. Put wins in /etc/nsswitch.conf like this:

hosts:          files dns wins

This line says, try looking in /etc/hosts files and then dns server and then wins server for the ip address of the name. This is only applicable if there is a WINS server in your network. If not, you're out of luck.

tips : to speed up netbios name resolution, try putting wins in the front like this

hosts:          wins files dns

I don't recommend this unless you access clients on your network frequently. Otherwise, the default should be enough.

Thursday, September 7, 2006

Samba explained

I'm done setting up samba server as instructed by my boss 2 weeks ago. The mystery of SAMBA have been revealed :). I never done this before. I mean I've never done setting up one for 'production' server. I learnt a lot from internet by googling and asking on a Linux forum to get hints. I wanna share a few tips here for us.

My setup
The first thing to configure is smb.conf. I use Slackware 10.2. This file is located in /etc/samba. For your distro, you should check in /etc or /etc/samba. This file is divided into 2 categories:

  1. global setting [global]
  2. share definitions (this is where you define your sharing directories)
Let's discuss them in turn

global setting[global]

workgroup - specify workgroup of your machine
server string - specify server string ie Samba server
security - specify your security here ie share or user. share is suitable for home use. user is more secure. You have to specify username and password when you want to connect to this samba server.
hosts allow - ie 192.168.0.0/24 or 10.0.0.0/16 , specify LAN clients allowed to connect. You may want to add localhost too ie 127.0.0.1
wins server - specify WINS server to be used by this samba server for faster NetBIOS name resolution ie 192.168.0.11

There are more directives to be set but I concentrate for simple setup only.

Share Definitions
Here you can specify what directory you want to make sharing. Look at this example:

[homes]
comment = Home Directories
browseable = No
writable = Yes

[public]
comment = For Public Consumption
path = /home/samba/public
public = Yes
writable = Yes
printable = No
writelist = @staff
browseable = Yes

[Finance]
comment = Finance's Stuff
path = /home/samba/finance
valid users = @finance
public = no
writable = no
printable = no
browseable = yes
write list = @finance
create mask = 0660
directory mask = 0770
force group = @finance

------
for [Homes], it is the home directory of the user if they logged in. browseable = No states that the directory is not browseable by other users or hidden. writable = yes states that the user is given read and write permissions.

for [public], the path for this folder is /home/samba/public. You have to make sure that this directory exist and make sure the permission is set as below:

drwxrwxr-x  root staff  /home/samba/public

this ensure that the staff group has write permission as stated by writelist = @staff. The other directives are self-explanatory.

For [finance], the path is /home/samba/finance and valid users = @finance states that only users in finance group can enter/access this directory and write list = @finance ensures that only users in finance group have read and write permissions. The "create mask" and "directory mask" ensure new and modified files and directories retain their correct permissions, and the "force group" causes all file read/writes to be the group finance regardless of what the user's primary group is, ensuring that all members can read/write/modify files. permissions. You should set the directory as :

drwxrwx---  root finance  /home/samba/finance

These are the tips that I got when I was setting up the samba server. I hope it can be useful to anyone who wanna setup a simple samba server in a LAN more secure by setting up the sharing directories correctly.

You can extend the above setup as you grasp the key concept above. The permissions of Linux directories should satisfy what you state in smb.conf or the other way around :). Otherwise it will make no sense.

Lastly, to restart the samba server , issue this command :

/etc/rc.d/rc.samba restart

or (if you use Fedora, Redhat or Mandriva)

service smbd restart

Have nice day!

Nvidia new hotplug feature on Linux

 If you use nvidia driver for your GPU, you probably wonder why in some config, you can't hotplug your second monitor. You need to reboo...